I've recently taken a couple of the Wilton cake decorating classes and I wanted to share with you one of the techniques I've learned. It's arguably one of the hardest flowers to create, but roses are so pretty that the effort is worth it. Besides, anything that turns out too ugly for the cake just gets eaten on the spot. I can't think of a better way to destroy the evidence of failure. Can you?
I created a video how-to for the process, but as my cinematography skills still need a little work, I've also included some still photos to help you get a closer look at some of the details. First-things-first though, you can't create roses without the buttercream. The following is Wilton's recipe for a great buttercream icing. It will make about 3 cups of stiff icing, but always needs a little more water than the recipe calls for in order to come together. If it's smooth and feels like super thick mashed potatoes when you stir it, you're on the right track.
1 Cup solid white vegetable shortening (Crisco recommended)
1 tsp flavoring (vanilla, almond, or butter work great)
2 Tbs water (start with this and add more as needed a tsp at a time while stirring until the icing is smooth)1 lb confectioners sugar, or approximately 4 cups (I use my kitchen scale and weigh it out)
1 Tbs meringue powder
A pinch of salt (popcorn salt works the best because it's finer grains blend into the frosting better)
Cream the shortening, flavoring, and water. Add dry ingredients and mix on medium speed until everything is thoroughly mixed. (Remember to start slow so you don't get covered in sugar, and then turn up the speed once everything is damp.) Blend an extra minute or so, until creamy.
And now, on to the video.
Also, as promised, the still photos.
Making the mound-
Keep the tip "buried" in the frosting until you have it almost at the height you want the rose. Remember you're aiming for the size of a hersey's kiss. Then stop squeezing the icing and pull away to create the peak of your mound.
Lay the decorating tip right next to the mound. Squeeze the bag and turn the flower nail at the same time to wrap to the top of the mound in icing. Cross the "wrap" over itself and end the petal at the bottom of the nail.
The first layer of petals-
Start placing the first layer of petals on the wrap, about half way up the mound. Keep the large end of the tip touching the mound at all times. While turning the nail, squeeze the bag and move the tip in a slight up and down motion to make a 1/2 inch petal. You don't want them to be too large. For the first layer you want a total of 3 petals.
The second and third layers-
Repeat the same process as the first layer of petals. You want a total of 5 petals in the second layer, and 7 in the third. And although those are the suggested number, use your eye to determine what's right. If you got a little lop-sided and you think that you need one more or one less petal to make the flower look proportionate, do it that way. Flowers in nature don't have a set number of petals, so why should icing flowers be any different?
 A lot of practice, and a lot of patience will make your roses better over time. It took me 2 weeks to get my starting mound to even look right, so don't get discouraged if you're having trouble.
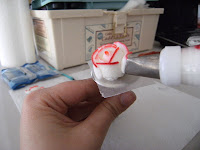
You also may have noticed (or at least I hope you did) that I made white roses with a edge around the tips of the petals. Wanna know how I did it? Before you put your icing in the bag, use a small paint brush to paint a line of food coloring on the bag. Then fill your bag with icing. Make sure the narrower end of your rose petal tip lines up with the color strip so that the color comes out on the correct part of the petal.
Now go whip up a batch of cupcakes and cover them with pretty roses! We've all got to do our part to encourage spring to come along. And don't forget to tell me how they turned out. Let me know if I left out any directions or if you need extra encouragement too. Good luck!


2 comments:
Best demonstration I've seen. Nice roses! :) Have you tried Fondant decorating yet?
I'm waiting for class sign-ups for fondant & gum paste. We didn't have enough people in our Wilton course 1 and 2 to continue. So I'm keeping my fingers crossed that they'll be posted next month.
Post a Comment