Thursday, April 28, 2011

A New Spin on Yarn

(If that title hasn't been used a million times already...)

Any-who...

I'm trying out a hobby that is new to me, but is in fact very old.  So old that most folks don't even do it any more.  I'm trying spinning. Not the sweaty kind where you're surrounded by a bunch of strangers on stationary bikes at the gym, but the yarn-y kind where you turn fiber into something you can knit with.

It is a lot harder that all those online videos that I've been watching make it out to be, but I did manage to create a horrendous-looking  yarn-like creation last night on my 2nd attempt with the new drop spindle. (We're not going to even talk about the first attempt.  Let's just say it involved a lot of words that sweet little ladies aren't supposed to say and a certain dachshund who thinks he's starved for attention.)


I whole-heartedly blame the ladies of "My Other Hobby Swap Group" on Ravely for this new interest. Especially Becca, who makes things like this, which make me want to drool over my keyboard every time she posts a photo of her spinning:


Seriously...how could you NOT want to knit something out of yarn that pretty. (P.S. She's got an etsy shop here.) I am determined to make something I can knit with, so I'll keep practicing and show you another picture when I deem the yarn worthy enough.


Monday, April 18, 2011

Advertise Here!

In a previous post I mentioned that I recently became certified as an instructor to teach jewelry classes for Michaels.  It's going well, but not getting off to quite the start I wanted. Normally, Michaels has a dress code for its employees of a black shirt and khaki pants, but they're letting it slide on Fridays in favor of a red, white, and blue theme from now until July 4th. We're encouraged to jazz up our patriotic colors by decorating our shirts.  How does this relate to my jewelry class?  I designed my t-shirt to be a walking advertisement.


This is one of 2 shirts that I created using my new cricut machine. (Yes, I bought a cricut.  I've only been eyeing them for the better part of a year...so this just gave me the perfect excuse.  That and a price-match to a competitor's sale ad.)  The other shirt is red and reads, "Yeah.  I made it.  Take a jewelry class and you can too."  For the beaded section I installed 2 metal eyelets in the back of the shirt.  I strung up the beads just like I would to make a bracelet, and used 2 bars from a toggle style clasp to finish the ends. So now, I can take the beads off to wash the shirt, or swap the same "bracelet" back and forth between my 2 shirts in a matter of seconds. (Insert gloating over my genius here.)

Now, if you've ever heard of the cricut, and actually know what it does, you're probably wondering how I made the lettering for my shirt with it.  Instead of scrapbook paper, I put a piece of freezer paper on the cutting mat with the paper side up and the waxy side facing the mat.  I cut out the words with the cricut and used the negative image as a stencil. Peel the freezer paper off the cutting mat, and iron the paper on the shirt. See this tutorial for step-by-step instructions. (My only suggestion is to sort-of disregard her note about setting the paint with an iron at the end.  You only have to do this if the instructions on your fabric paint TELL you to do this. Not all paints will need it.) Three coats of white fabric paint later...finished shirt!  Hopefully it will encourage more people to become my students, instead of just customers. Even if it doesn't, that's a pretty awesome looking shirt.  : )

Monday, April 11, 2011

Favor Construction

As promised...photos and instructions for the wedding favors.

In case you missed them before, here's the list of materials you'll need:

  • Glassine favor bags, mine came in a pack of 100 from Wilton. (Which is handy, because that's the number I need to make!)
  • Wild flower seed mix of your choice. I purchased two 32 oz bags, which I'm approximating will be enough for just over 100 favors
  • Hand-held ribbon punch
  • Ribbon, no wider than your punch will accomodate.  Mine is 1/4 inch wide, and I'll be using 12 inches per favor.
  • Colored office paper to match your theme
  • Decorative scrapbooking brads.  I purchased two 50 packs of silver hearts.
You will also need some sort of word processing software and a printer, and either a paper trimmer or a pair of scissors to separate your "flyers".

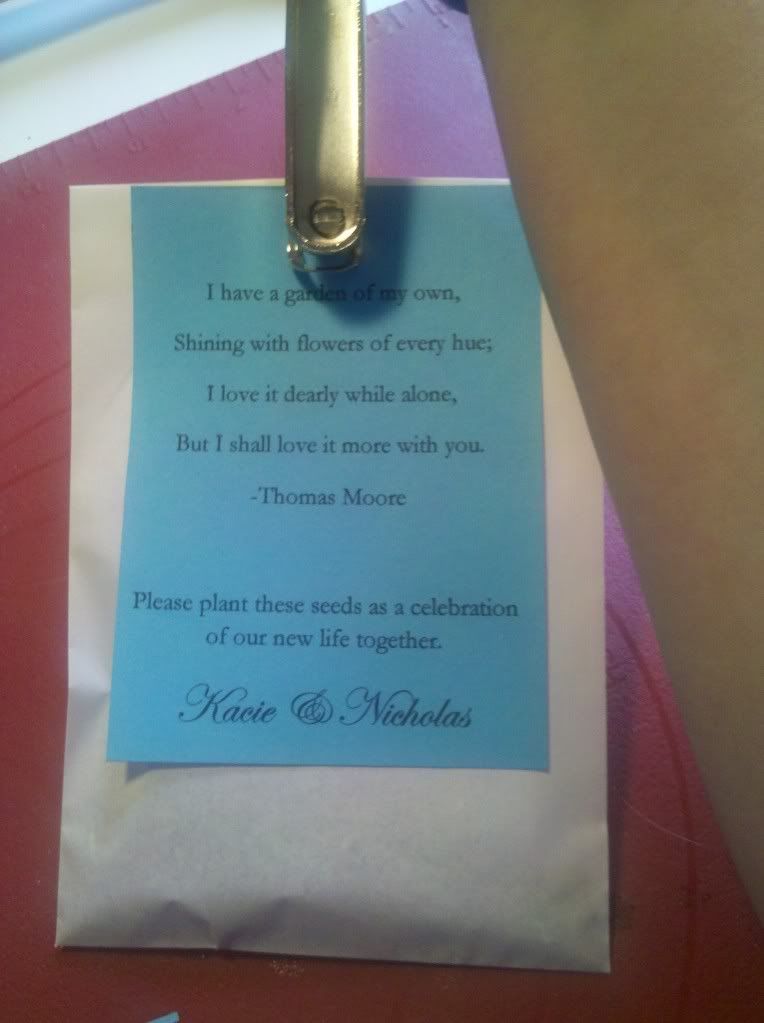
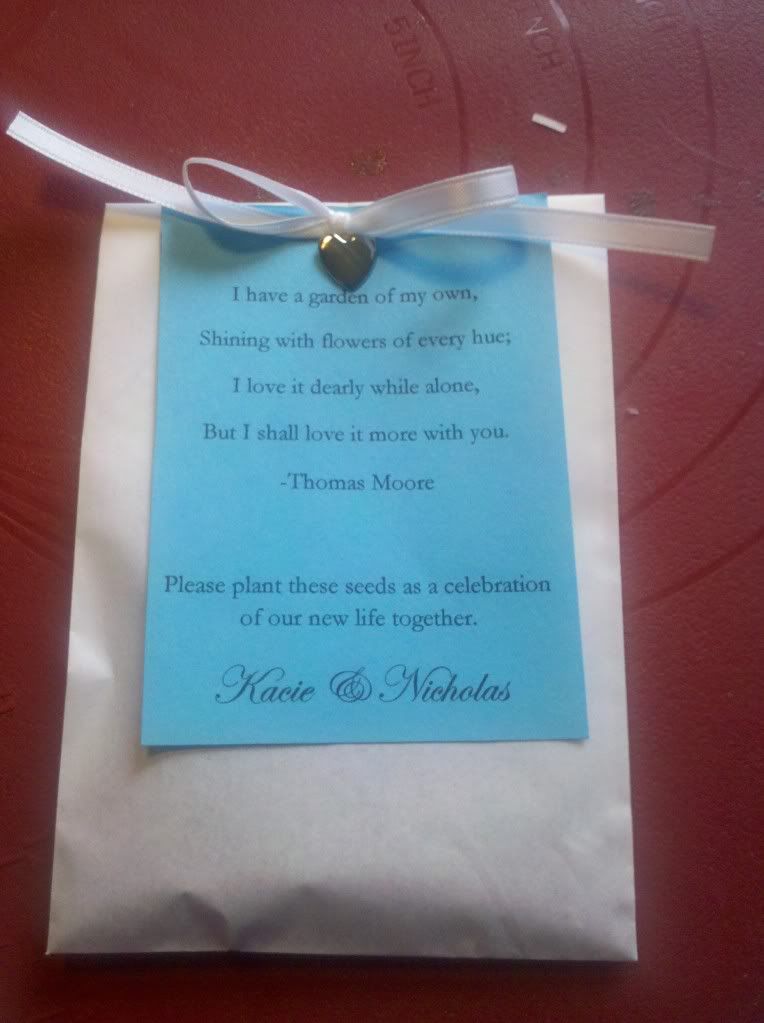
The first thing you need to do is create the flyers with your personalized message.  I found a cute quote about gardens, and included a little note for my guests. Use your word processing software to maximize the number of flyers you can print on one sheet. (Hint: you can make them 2 sided and include the planting instructions for the seeds on the side that faces the bag.) In my case, I was able to fit 6 "messages" on one page. Don't forget to leave extra space at the top of the message to allow for the decoration above it.

Print out as many pages as you need for all your favors, and trim them down with your scissors or paper trimmer. They should be slightly smaller than your favor bags. Set them aside for the time being.

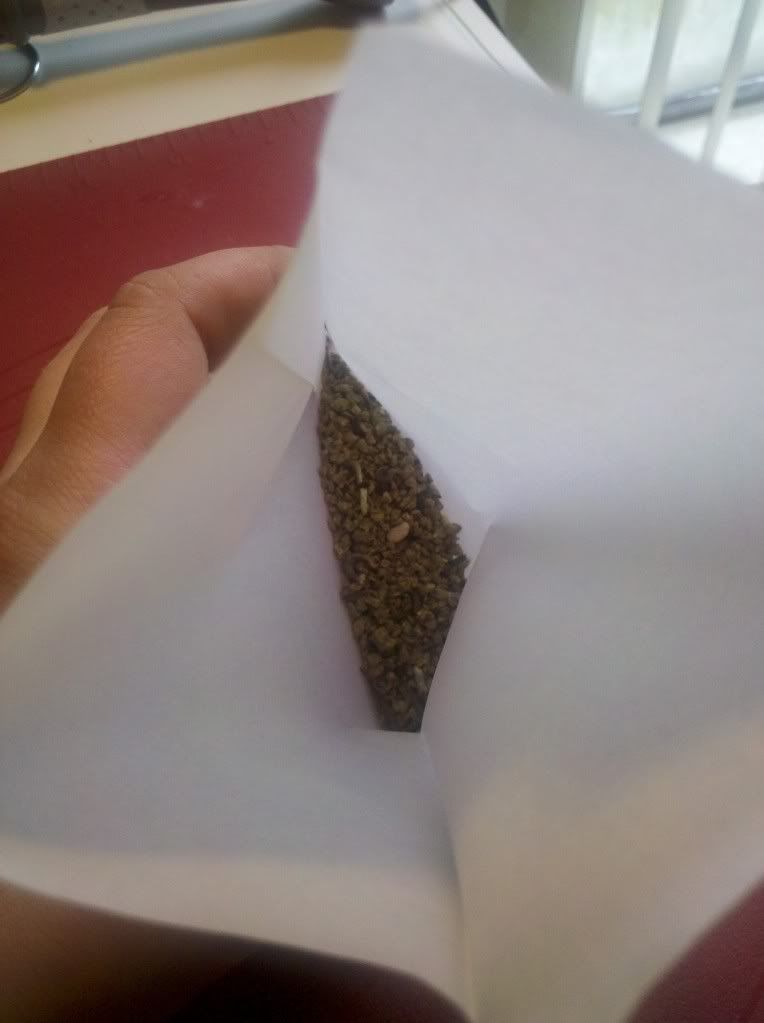
Next, start filling your bags with the flower seeds.  I put 1 Tablespoon of seeds in each bag.  It may not look like a lot, but there are plenty of seeds in that small amount of mixture.  If you'd like to add more, don't be afraid to do so, just expect that you may have to purchase another bag of seeds.

Fold the top of the bag down (at least twice) to prevent the seeds from falling out. Then lay one of your flyers on the front of the bag. Use your ribbon punch to set a hole through all the layers.  I just eye-balled what looked like the center of the bag, but you can measure it if you like.

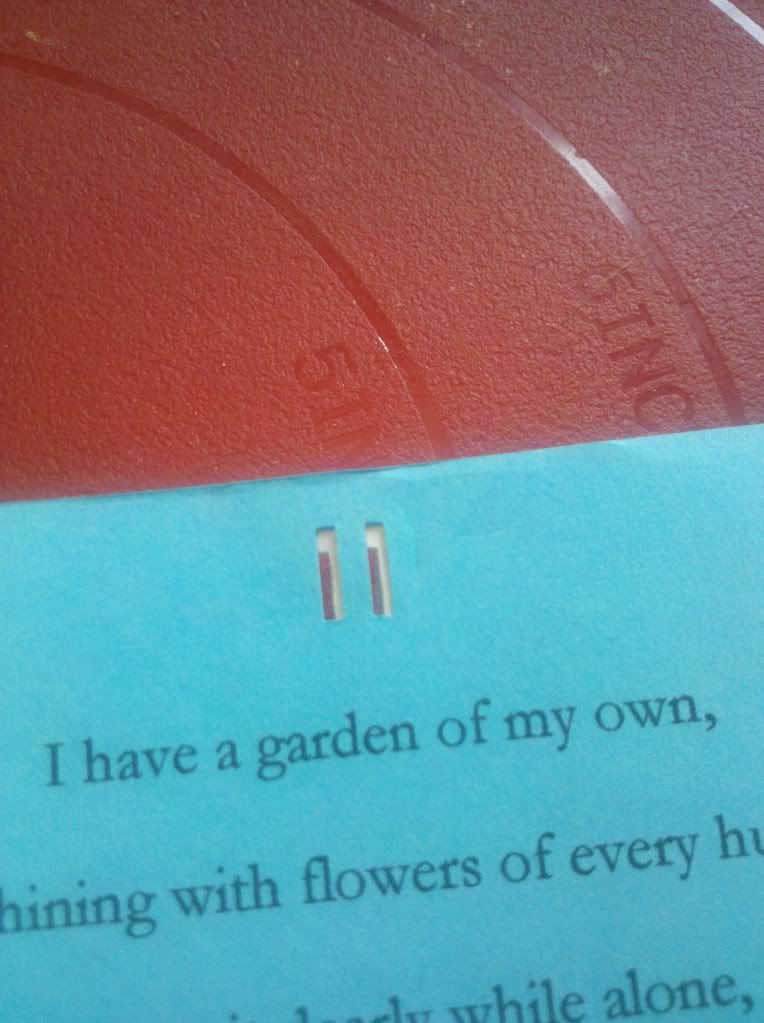
Before I go too much farther, let me stop and explain what a ribbon punch is.  It works just like a single-hole punch, but instead of making a round hole, it leaves 2 parallel rectangles which are designed to string ribbon through.  You can get them in a single, hand-held punch like I used for this project, or as a larger punch designed for borders, which will punch multiple holes at the same time, while keeping them evenly spaced.
This is what the holes look
like for a ribbon punch.

After your holes are places, cut a section of ribon 12 inches long, and string it through the holes.  Tie it in a bow, being careful not to pull too tightly that it crushes the center divider between your two punched holes.

You should have a little wiggle room after tying the knot of your bow.  Using that same space, slide the brad into the holes just below the bow. Open the tongs on the back side of the envelope to fasten it in place. 

Ta-dah!  You have a finished wedding favor to pass along to your guests.


Sunday, April 10, 2011

Outlook is Favorable

I am soooo very excited about my wedding favors that I couldn't even wait to take a photo before I blogged about them. Mostly, because they work out to cost only 45 cents each!  Here's the break-down:

<> <> <> <> <> <>
(1) 500 pack of colored paper-regularly $14, but I used a coupon for half off at Michaels.  There's 5 colors in the package, so calculating out just what I'm using for the favors ($7 divided by 5), this equates to 100 sheets for:$1.40
(1) package of 100 glassine favor bags by Wilton (I could have gotten this half off at Michaels if I wanted to come back another day with a separate coupon)$10.00
(4) rolls of 1/4 inch ribbon (I had these on hand, but I'm over-estimating their price since I bought them on sale for 3 for a buck a while ago)$4.00
(2) Packages of decorative heart shaped brads, purchased during a 40% off sale at Michaels, normally $2.99 each$3.60
Hand-held ribbon punch, purchased at full price (Again, I could have gotten this half off at Michaels if I wanted to come back another day with a separate coupon)$6.00
(2) packages of wild flower seeds (32 oz each) from Lowe's for $10 each$20.00
Total cost for supplies$45.00
Divided by 100 favorsequals 45 cents each


Photos and assembly instructions to follow next week!

Wednesday, April 6, 2011

Wedding Crafts

This past month has been extremely busy, but I have managed to crank out some more wedding crafts, including this nifty T-shirt using the leftover hotfix crystals from making my veil.


I've also got a good start on my jewelry, despite the horrible photographs that accompany them.


I also plan on making a matching bracelet for myself and similar jewelry for my bridesmaid.

Also in jewelry news...I held my first class as a certified jewelry instructor on Monday at the local Michaels.  I'm looking forward to creating more jewelry projects to help with marketing. It should be a lot of fun.