Thursday, August 27, 2020

Remote Learning Double Desk

Hey! 2020, am I rite?!

I actually posted an update or two on here about how life has changed now that the kids are no longer toddlers, but in true 2020 fashion, those blogs seem to have mysteriously vanished. 

Global pandemics sure have their problems, but I'm hoping I might be able to help with one in my own small way. 

Enough room to work, but narrow enough to be out of the way in our dining room.


We're gearing up for a new school year and our district has opted to start with remote learning. (Which is apparently different from virtual learning. Woe to those that confuse the two!) That said, the kids needed a dedicated learning space. While I'm a huge fan of cheap Ikea furniture, when you're under threat of losing the one income your family has, you don't want to be shelling out a ton of cash to buy each of your kids a desk. I needed something fast. I needed something even cheaper than the cheap Ikea desks. I needed it NOW. And by now, I mean instantly--way back in March when school was abruptly cancelled. We've now been living with our home-built, 2 person desk for 6 months and have been extremely happy with it.  

Building it was a home school project itself! The kids measured, Mom cut, we assembled together!

We already had tools, so I didn't include those in the build price, but all the materials made a 6 foot long double desk (perfect for both kids to sit side-by-side with a bit of space between) for under $32. If it was in stock anywhere (because everyone is buying desks right now, either learning or working from home) we were looking at at least double that price, having to purchase a desk for each kid. The tools you need to make this are nothing fancy...a tape measure, something to cut your 2x4's (if you're really in a pinch, the store can most likely do that for you) and a drill to screw it all together. SUPER SIMPLE and it can be completely finished in a single afternoon! 

Once it's built you can customize it as much or as little as you want! We didn't finish ours, but you can easily stain or paint it. (I bet the kids would love choosing a paint color for their custom desk!) I added 2 hooks so the kids could hang their headphones at their workstation, and some cord management underneath because Jake kept tangling his toes in the laptop power cords (on purpose) while he worked. Now that the job situation has stabilized a bit more, I've considered getting a peg board to attach to the back and give us more storage space for school supplies. This is the only change I've considered making, but I haven't done it yet. (Really hoping they go back to school in person after October. 🙏) If you'd like to build your own, I have the materials, dimensions we used, and the instructions available in this PDF. Come back and share your custom builds! 

Monday, September 14, 2015

Pinterest Water Blob Review

Hey there! How was your summer? We're swiftly moving into fall, but I wanted to review a project the kids and I tackled this year before I forgot about it.

This summer was HOT in our part of the world. Since we don't have air conditioning in the house (with the exception of 1 room) that meant we were DESPERATE to find ways to keep cool. While browsing Pinterest I kept coming across tutorials for water blobs. They looked like crazy fun, so we decided to give it a try.


I combined these 2 tutorials to make a water blob for each of the kids. hello, Wonderful. and homemadetoast. From cutting my plastic, to having both of the blobs full of water and ready to play took about an hour and a half. Most of that was waiting for them to fill with water.

I went with 3 foot wide plastic sheeting in 4 mil thickness; Truthfully, because the store was out of the 10 foot size I'd seen in several tutorials to make one giant blob. In the end though, I think it made the project a lot better. It was the perfect width for each kid to lay on, it was more easily managed on my ironing board, and if I had gotten the 10' wide roll and wanted to make individual blobs it would have made for a lot more cutting. The 3' wide roll saved me that.

Since my kids are roughly 3 feet tall, these didn't need to be very long to accommodate their height. I cut my plastic to 8 feet long, then folded it in half on itself so I had 2 blobs roughly 3' x 4'. If you want them longer, just cut a longer strip! If you can trust your kiddos not to run all over the plastic while you're trying to cut and iron, go ahead and try it any time. For us, that's not the case, so I made sure to prep the blobs during nap time so they were ready to play with as soon as the kids woke up. The ironing directions are perfect from homemadetoast. Follow them to the letter and you can't go wrong.

Some notes about the project:
  • Make the hole for the hose larger than you think you need. I made mine about the width of the hose, but forgot about stretching for the height. It was a pretty tight squeeze getting it in and out of the blob, but it did work.
  • Clear out even the tiniest sticks in the yard if you want your blob to last. If the kids had just laid on the blobs, we'd probably have been alright. Avery insisted on body slamming the blob though, which meant a bunch of tiny leaks on the underside of the blob by the end of play time--all of which coincided with a small stick that I didn't bother to clear out. Even with the leaks we had SEVERAL hours of play time. (I left them in the yard overnight and it still had water the following morning!)
  • Use LOTS of duct tape to seal the corner where you left the hole for the hose. That's where you'll get the most leaks. Layer it up to make it last. You can also use duct tape to patch any other leaks that spring up while you play, but it adheres better to dry plastic.
  • Use the iron method!!! I also saw several tutorials where folks just used duct tape to seal the edges. A friend of mine confirmed (after we tried this) that it just leaks like crazy. They had to throw their blobs away after one use. We were able to use our several times before Avery slammed too many tiny holes in the bottom with the sticks.
Overall, this was definitely a win. It kept everyone cool and the kids had a lot of fun. You'll also most likely have a ton of plastic sheeting leftover. I used some of ours to make an i-Spy bag for a road trip to the lake!


Thursday, April 16, 2015

#BecauseOfJamberry

Update 2020: WOW! This was a long time ago! I've since left Jamberry (and well, Jamberry has also left Jamberry, being sold off to another company and all...) but even though it's old, this post still very much applies to my feelings about being in direct sales so I've decided to leave it in place. Enjoy! And if you feel so inclined, you can play with Maniology nail art using my ambassador discount FANCYMOM10 at https://maniology.com/

Original post 4/16/15:
You may or may not know this, but I became in Independent Consultant for Jamberry Nails in mid-February. This week a popular blog featured a strongly worded article bashing the direct sales industry, including the company I chose to join. (If you're interested, you can read it here. I still hate the article, but it is sort of relevant to the one you're reading.) While I find it disappointing from a business standpoint (Thanks lady! You just made my job even harder!) this hurt more on a personal level. Why? Because I didn't start my business with money in mind. Sorta. Read on to hear my explanation.

It's no secret that I am a stay at home mom to 2 young children. It's a job that's challenging, rewarding, and exhausting. I wouldn't trade it for anything in the world. My staying at home though means one thing...every dollar that comes into our household is earned by my husband. My children and I depend on him for food, shelter, clothing, transportation, recreation, you name it. Without his job we have nothing.  But that's the thing about marriage, you're supposed to put your trust in your spouse and you work through things together. In our family he's the breadwinner and I manage the household. It works for us. For me, the catch is when it comes to "want" items instead of "need" items.

I have a lot of crafting hobbies. I also like fun things like pretty nails, or a new pair of shoes, even cool gadgets to use in my kitchen. Those "want" items cost money. When I spend money on things for the family it's no big deal because it's something we all enjoy together or it's essential for our survival. (Somebody has to go grocery shopping!) But when I'm spending money that somebody else (hubby) earned on an item that is just for me it doesn't feel like a fun splurge. It makes me feel guilty and selfish. Never mind if I actually deserve a nice treat. I felt like if I wanted to continue purchasing these fun things, I needed to chip in somehow. My answer was Jamberry.

Now you might be thinking, "Well...Why don't you just go out and get a job?" Here's why: Even though we are solidly parked in a middle-class neighborhood, the city we live in is the overall wealthiest area in the state. The opportunistic folks who live here have jacked up the prices of all goods and services accordingly. If I were to get a part time job outside my home 2 things happen. First, ALL and I do mean ALL of the money I would make from that job would be spent on childcare. More likely, it would be all of my paycheck plus a portion of my husbands since we have 2 kids still in diapers. (Some of my husbands friends invited us over for dinner a few weeks ago and confessed that the daycare rate they'll be paying once their second child is born will be over $1800 per month. That's after giving them a break for having a 2nd child in the same daycare, and a break for the oldest for being potty trained.) These child care costs were a major factor in my deciding to stay home with the kids in the first place. Even if we could afford to spend that much, I would not be willing to. The second thing that happens if I take a job outside the home is that I lose any teensy bit of free time I have. Since daycare is not an option, I would be forced to work nights and weekends so that I could work around hubby's schedule. This would mean no free time for me and no time together as a family. Sure we could survive it, but what's the point of the extra income if there's no opportunity to enjoy it? My answer was Jamberry.

Here's the other thing about being a stay at home mom...it can be lonely and isolating. Yes, I love my children, but they cannot carry on a meaningful conversation just yet. We also moved over an hour away from family and friends to be near my husband's job. The couple I mentioned above...they are the ONLY friends I have who live within a 30 minute drive from our house. I have a solid group of online friends through Ravelry, but those friendships revolve around our children. We only found each other because we were all pregnant at the same time. I have tried finding mommy groups in the area only to discover that I can't stand the people in them. (Turns out that some wealthy folks live up to the stereotype of being snotty.) And again...those friendships would all be based around the kids. How long can you go without interaction with another adult? How long can you go without the conversations being about one of your children? After spending over 2 years without real-life friends nearby, I didn't just want a conversation that has nothing to do with kids. I needed it. My answer was Jamberry.

My answer was Jamberry because I needed something just for me. Not for the kids, not for the whole family, not for my husband. ME. The fact that I could run a business completely online, with my wild ones screaming in the background the whole time was the golden ticket. I don't need to find child care. I can work with them right beside me. Jamberry allows me the opportunity to earn a little something extra to pay for my "want" items, and I don't have the guilt anymore when I actually purchase them. Am I rolling in dough over here? Obviously not, but I didn't expect that going in. The option is there, but I just don't want to work that hard. This is a hobby for me. (Jamberry suggests the average consultant holds 2-4 parties a week. I do 2-4 in a month.)

In addition to the extra fun money I have met so many amazing people, even in the short amount of time I've been doing this. Jamberry has a slogan that says, "Run your own business without being alone." This has never been more true. I have felt valued by every team member I have encountered so far. I've even reached out to the home office with some suggestions about our consultant websites and they responded to me! Not a robot-response, but a personal, back-and-forth conversation! Consultants support each other with tips and ideas for our businesses, but we've also gotten to know each other in more personal settings. One of the girls is getting married next month. Her Jamberry business is helping to pay for her wedding. Some of the other girls are helping her coordinate nail wraps (and design custom wraps) to match her bridesmaids dresses. Show me another direct sales company with teammates who are that awesome!  I feel like I have friends again!

As for the portion of that rotten article that states, "The products are secondary. It's the exploiting of friendships to gain new recruits that really squicks me out." I call baloney. Nobody is going to sign up and pay to be part of something like this if they don't truly want it. Especially your friends. I flat out told my sponsor, "I'm not creating a team." (She told me that was great and I could run my business however I wanted!) Well guess what...I've got a girl set to sign up this coming Friday! Not because I conned her into it, but because SHE ASKED to join this company. Just like me, she has a need for some extra income, and along with whatever other reasons she has, she realized that Jamberry was a good fit to meet those needs.

Digression: At this point I'd like to make another thing clear. My business is NOT a pyramid scheme. Will I make bonuses based on my recruits? Yes. BUT! I need to hit my OWN sales goals in order to earn those bonuses. I'm not just sitting back raking in money that somebody else worked hard for, and somebody else higher up isn't doing the same to me. /end digression.

So this long rambling post boils down to this...There are also BENEFITS to direct sales companies. Focusing on bad business practices and the irritation of receiving multiple Facebook invites does not reflect the true nature of my business. I've gotten so much more out of this opportunity than I ever expected. The people on social media who are inviting you to these parties are just trying to share the same joy that they've found. If you aren't interested, politely say "No, Thank you." and move on. A good consultant will respect that.

Saturday, October 11, 2014

A Viking We Will Go!

A friend of ours is throwing a costumed birthday/Halloween party next weekend. It has a viking theme, so I decided the kids needed viking hats to wear.  I couldn't quite find a pattern I liked, so I whipped up my own. Below you'll find the pattern for the hat base, along with a link to directions for the horns. (Those were created by another crafter on Ravelry named sar.) My hat pattern is crochet. Sar's horns are knit. Perfect chance to learn another craft if you only know one! (Or neither.)


Avery's Viking Hat
Finished size approx. 18" circumference to fit a toddler
Worsted/Aran weight yarn and size I hook. Click Here to see which yarns I used. Less than half a skein of each color is needed.
Gauge: 3sts and 3.6 rows per inch- make a swatch so you know it will fit!!

Work continuously in the round. (Do not join end to beginning of round with a slst.) Place a marker in the first stitch of the round and move it up as you complete each round. This pattern uses American crochet terms.

Row 1: Work 6sc in magic circle.
Row 2: 2 sc in each st around (12 sts)
Row 3: (1sc, 2sc in next st)* around (18 sts)
Row 4: (sc in next 2 sts, 2sc in next st)* around (24 sts)
Row 5: (sc in next 3 sts, 2sc in next st)* around (30 sts)
Row 6: (sc in next 4 sts, 2sc in next st)* around (36 sts)
Row 7: (sc in next 5 sts, 2sc in next st)* around (42 sts)
Row 8: (sc in next 6 sts, 2sc in next st)* around (48 sts)
Row 9: (sc in next 7 sts, 2sc in next st)* around (54 sts)
Row 10-24: sc in each st around
Row 25: sc in first st. (Bobble stitch into the next st. sc in next 2 sts.)* around. sc in last st. (18 bobbles)-Note: for my bobbles I DC'ed 4 sts together instead of 5 like the video shows.  It shouldn't matter, but in case you want your hat to totally match I wanted to point it out.
Row 26-27: sc in each st around. At the end of row 27, join yarn to the beginning of the round with a slst. Bind off. Weave in ends.

Horns. (Directions are in the notes section at the bottom of the page.) Make 2. Stuff with a small amount of Poly-Fil. Attach to either side of the helmet using yellow yarn, just above the bobble "rivets". Hint: You should have 18 bobbles. Center one of the horns just above a bobble and you can count 9 bobbles in either direction to line up the position for the other horn. I used a US size 8 (5.0mm) needle to knit my horns.

If desired, add braids to the hat, centering them just below the horns. This is how to do it. I cut my yarn to 24" lengths, and then folded it in half to secure to the hat. After knotting the ends of the braids, I trimmed the excess with scissors to my liking. I used a total of 24 strands on each side of my hat for chunkier braids. This made knotting the ends difficult, but with a little fiddling I managed to do it. Experiment with yarn amounts until you get braids you're happy with.


Because elements of this pattern were not designed by me, please craft items from this pattern for personal use only.


Glossary:
st(s)-stitch(es)
slst-slip stitch
sc-single crochet
*-repeat

Tuesday, September 30, 2014

Crazy Update

This will not make sense unless you've read part 1.

I have "processed" about half the diaper stash with the aquarium ammonia remover. (The other half hasn't been done because I'm out of the solution and have been too busy lazy to go get more.) The verdict is...it works. Mostly.

Per the directions on the blog post I linked in part 1, I used the highest water setting my washer allows, adding 60 mL of the ammonia remover, and soaked the diapers in hot water for 6 hours. After the soak I ran a rinse cycle, followed by a full wash cycle which included detergent and an extra rinse.

Immediately you could tell the inserts were better off. The ammonia remover got out a lingering funk that was on all of the inserts.  That funk never really smelled like ammonia, nor did it smell like barnyard (which is another scent all the diaper blogs caution you about), and I'd always chalked it up to leftovers from our strange water conditions. It didn't smell bad, but it was just sort of there. You would only notice it when you placed an insert against your nose and intentionally took a good whiff. And yes, I did that often while trying to assess the problem with these diapers. I'm not weird. Check the other diaper blogs...those moms did it too.  The scent might have actually been from our water, it might not have, I have no idea. Either way it's gone now, if only temporarily.

The majority of the diapers go on the kids, get used, and come off with no issues. No rashes, no immediate ammonia stench coming from the diaper itself. But there are a select few diapers that the solution seemed to help, but didn't completely rid them of ammonia. And it's random across the diapers that have been treated, not like it is one of the 2 brands we use or something like that. The random diapers are better than they were before, just a bit of redness on the kids instead of full blown chemical burns, and they clearly smell like ammonia when you take them off (instead of smelling like some ammonia-mix weirdness which was part of the problem in diagnosing this issue) so I know I'm making progress. If I segregated those diapers from the bunch and repeated the process it would probably do the trick.

We are at least back to a manageable point. I can use our cloth diapers, though there is still work to be done before I'll be completely happy again.  I'd recommend the aquarium ammonia remover as a last ditch attempt to save your diapers (like I needed), but not as a regular maintenance type of thing.

Monday, September 8, 2014

Trying something sort of crazy...

Remember back when I posted a video on washing cloth diapers? It was roughly a year ago. That cleaning routine was fantastic...until the day it quit working. Right about the time kiddo #2 was born we started getting some issues with ammonia build up. It only seemed to occur in Avery's diapers, and not Jake's so we chalked it up to toddler pee and tried making some small tweaks to the wash routine. Well...Jake is 8 months old now and we're still battling this thing, which has turned into a raging monster. Both kids are getting full-on ammonia burns after putting on 1 cloth diaper, and this is 1 or 2 wash cycles after stripping.  I'm at my wits end!

At one time or another over the past 8 months this is what I've tried:


  • Cutting back on the number of diapers washed at one time
  • Increasing the wash frequency to every day instead of every 2-3 days
  • Eliminating ALL additives from the wash. (For a while I had been adding a few drops of Grapefruit seed extract and tea tree oil after Avery got a yeast rash, so I wanted to make sure I completely killed that too.)
  • Switching to a different cloth-safe detergent, and another one after that
  • Switching to Tide
  • Soaking in Vinegar 
  • Soaking in Bleach
  • Soaking in a Vinegar/Oxi-clean solution
  • Stripping with blue Dawn
  • Stripping with RLR
  • Stripping with just hot water
  • Boiling the inserts using a pot on the stove
  • Adding more detergent to each load (we also tried less at the beginning as I thought our problems might have been from detergent build up and not ammonia)
  • Adding "Funk Rock" to the routine, including do a recommended soak with it
  • Rinsing both wet and dirty diapers before putting them in the diaper pail
  • Leaving the diaper pail lid open to encourage air flow
To a degree, some of these things helped.  It would knock back our problems for a little while, but then they'd come creeping back slightly worse for the next round. I'd say the boiling was the most helpful, but it was a complete PITA and it made me nervous to do it when the kids were awake, so it took forever to get all of our inserts done. I refuse to do it again. I also realize that ammonia in my diapers means they are not getting fully clean in the wash and that a change in my regular wash routine is required. However, nothing I change is ever going to work until I get the ammonia completely out of my diapers for good. I have to get them back to being super clean before I can truly test any changes to my wash routine.

So I went browsing, again, for a solution. This time I found a suggestion for using ammonia remover that is used in aquariums. After a quick google search of "Aquarium Ammonia remover for cloth diapers" the first article came back with a title along the lines of "Ways to ruin your cloth diapers". While this was not a promising start, I read several more articles claiming this actually worked with no ill-effects to the diapers. And now I have 28 microfiber inserts soaking with this stuff in my washer right now. (Here was the article with actual directions.)


Quite frankly, it doesn't matter if the ammonia remover ruins my diapers.  They are already ruined in the sense that I can't put them on my children without causing physical harm. Cloth diapers do not benefit me sitting in a drawer. And I'm dumping cash into disposables while I'm trying to heal their rashes and get the ammonia out of the diapers. This stuff will either be a $5 miracle fix to get rid of ammonia, or I'm dropping a lot more money to find a new solution. That may be in the form of buying cotton prefolds to stuff into my pockets (Supposedly, those are less likely to cause ammonia issues because the fabric washes more easily than microfiber) or giving up cloth completely and switching to disposables. I'll let you know how the experiment turns out...

Here's the verdict.

Monday, September 1, 2014

My! What a snazzy helmet you have!

So here's Jake, in all of his adorableness, now accessorized with his swanky new cranial remolding helmet.


Wait. Hold up. Huh? A helmet? Explain Kacie.

Jake has torticollis and positional plagiocephaly. In language we all understand, that means he has a stiff neck muscle (torticollis) and because it was so stiff he had trouble turning his head to his left side. Since he wasn't moving his head around, he developed a flat spot (the plagiocephaly part) on the back side of his head where it was constantly resting against whatever he was sitting in. (Swing, bouncer, crib, car seat, whatever...) So for a few months he has to wear a helmet to fix the flat spot. His torticollis has resolved with a bunch of physical therapy stretches, thankfully, so now the "silly hat" as we like to call it can get on with doing its job.

Only...A plain white helmet is no fun! So we decided to give it a bit of spunk and personality, just like our little Jakers. Since I never found a tutorial on how to do this (trust me, I looked) I thought I'd share how I did it.


I used a combination of clip art from the web, and Microsoft Word to create a series of images and text that would be turned into stickers. There was no real good way to do this, and the process changed a little depending on what I was trying to achieve for each sticker. I will say, I took my time with it, and all told it took several hours. Of course, if you had some version of Photo Shop, I'm sure the process would go much more quickly and easily. I don't have that, nor am I willing to pay for it, so...yeah. Essentially, I laid everything out the way I wanted it to appear in Microsoft word by combining my images and text on a drawing canvas (or a text box) and played around with the "bring it forward, send to back" junk until it looked right. I'd take a screen shot of the computer and paste that into Microsoft Paint. From Paint, I could crop the item I was working on and save it to become one single image. Then I'd load it back into MS Word and resize the image to the dimensions I wanted and make the background transparent. (Think small if you want a lot! My images are roughly 1 to 1.5 inches and we have about a dozen stickers on the entire helmet.) By loading it back into Word, I could place all my images on a single sheet for convenient printing. This also allowed me to resize them as needed if they didn't fit the spots on the helmet nicely. (We didn't have the helmet at the time, so I had no idea how much room I would have available.) By making the background of each image transparent, the helmet color would serve as the background. I felt this would lend toward a more natural blending, almost like the images were printed directly on the helmet. The only exceptions are a couple of colored stickers, like the one in the image above on the right. As it turned out, sticker design was the easy part...

The first time I printed my stickers (Yes. First. In all, this took 3 tries.) I used Printable Sticker Paper made by Silhouette. I set my printer for overhead transparencies since this was the most appropriate setting my inkjet printer offers and clicked the print button. These printed BEAUTIFULLY! I was so excited! The images were sharp and the truly clear background was just what wanted. And then I tried to put them on the helmet. The problem is that these sheets are some sort of plastic-y/vinyl combo, so when I cut my images out and went to apply them, the material wasn't flexible enough. The odd, multi-directional curves of the helmet were just too much, and no amount of stretch and manipulation would make the stickers lay flat against the helmet. Back to the drawing board...

The next product I tried was a Clear Full Sheet Label by Avery (#18665). When I went to print I was a little confused because the label itself looks almost white. I had to peel the backing off a section to convince myself it actually wasn't. This is because Avery's version of "clear" is like a frosted window. It is not truly transparent. But we printed anyway! And it worked! I set out cutting my images and placing them on the helmet. The label paper is thin enough that you can manipulate the curves and get it to lay flat or close to it. There were a few stickers that had some wrinkles along a curve, but nothing bad enough that I had to scrap the sticker. The major problem I had was that the ink wanted to smear off while I was applying the stickers. (I let them dry overnight trying to avoid this.) I got around this by setting the sticker gently on the helmet and placing a paper towel over the top before applying pressure to adhere the sticker.  If I got a weird wrinkle, the adhesive on the back of the label is forgiving enough that I could peel it right back off and make adjustments to its placement. I got all my stickers on, went out to take all the above photos, and Jake started wearing it as soon as his nap was over. 

Then, "baby" happened. Jake is hard core teething right now, so his hands are always in his mouth getting nicely coated with drool. And since he was still adjusting to the helmet, he was also constantly grabbing at it and trying to figure out how to itch his sweaty little head. Drool plus sticker equals printer ink EVERYWHERE! In just a couple hours the ink was completely gone from at least 3 stickers and there were black streaks all over the plastic exterior. Don't worry though...rubbing alcohol (the same stuff you have to have on hand to clean the inside of the helmet) takes the ink right off the plastic. So I pulled the stickers off and "washed" the plastic back to a clean white start. We still have a bit of ink on the velcro strap that holds the helmet closed, but it isn't too bad. It was bound to get grungy anyway so I wasn't heart broken that I couldn't get the ink out.

After the ink fiasco, I needed to find a way to seal the stickers. Now remember when I said I had looked for tutorials? The only thing I could find were tips on how to apply pre-made vinyl decals. A site called Bling Your Band suggested using Mod Podge to seal the edges of their decals to prevent them from peeling off. It was something I was willing to try with my own stickers, but past experience with that product has taught me Mod Podge itself will smear anything printed on an ink jet printer. If it doesn't smear, it will cause the ink to bleed a little, meaning my nice crisp designs would turn into a fuzzy blob under the Mod Podge. Enter the sealer before the sealer...


I printed my designs for the third time. I let them dry on the label paper overnight. Then I sprayed the stickers with 3 coats of Krylon Matte Finish, which is a spray-on acrylic sealer. It only takes a couple minutes to dry to the touch and about 2 hours to dry completely. I did some chores around the house and then came back to cut out my stickers. As I started to put the stickers on the helmet, I already knew this was working out better. The ink wasn't coming off on my fingers as I applied pressure to the stickers. No more paper towel needed. The Bling site also showed the decals being applied with a squeegee to help eliminate bubbles and wrinkles.  I didn't have a squeegee, but I did have a plastic scraper for my Pampered Chef baking stone.  I used the edge of that to help smooth out my stickers even further and it worked great. I have a couple of stickers where I dug in with the scraper a little too much because I was really trying to even them out along a curve. It took a little of the ink off because I went right through the acrylic layer.  So if you do decide to use another tool, just be careful with how much pressure you apply to a "sharp" edge.

Once the stickers were all on the helmet, I used a 1" foam brush to apply Mod Podge with a matte finish. 
Just follow the directions on the bottle. The small size is more than plenty. I used 3 coats and felt that was enough. (And by that time, it was close to 2 in the morning...) I let it dry the rest of the night and Jake wore his helmet the next morning. The finish has held up well, and NO INK SMEARS!! It's been roughly 2 weeks since I put the stickers on and the Mod Podge doesn't even look scratched.  If I do need it, we have plenty leftover after the original application to add some layers.
A few more notes about the stickers: 
  • The label paper I used, as stated before, has a frosted background.  When applied to my white helmet, it blends in and you can't see it at all. I do not know if this will be true if you have a colored helmet.  The edges of your stickers might show more. However, the borders will be more noticeable anyway after you apply the Mod Podge, so this could be a moot point.
  • Even if the shape of the sticker lends itself better to being cut in a circle, I found square stickers were easier to apply and get to lay flat. If there were going to be wrinkles, the square stickers wanted to do it in fewer directions when applied to a curve.
  • Finally, there were some comments on the Bling site that state rubbing alcohol will remove the Mod Podge if you wanted to swap out your stickers.  I plan to keep the same ones, but just in case, I've been careful when cleaning the helmet to make sure I don't over-spray the exterior. The comments say the alcohol will cause the finish to bubble and then you can peel it off in sheets before reaching the sticker itself.


Wednesday, July 9, 2014

7 unexpected things about breastfeeding that new moms should know and I had to figure out on my own

My second child is starting on solid foods.  That got me thinking back on the crazy road we've taken with nursing up until this point, and all the things I wish somebody with actual experience would have told me from the get-go. So, in no particular order, here are some of the things I've learned while breastfeeding both of my kids.

(P.S. This is Jake. I don't think I've actually introduced him to the blog yet.)


1. Newborns will not always wake to nurse despite needing to eat every 2 hours. This is even more true when your kids have jaundice, which both of mine did. I would need to play with their feet, tickle their necks just below the jawline, and the most cruel way to be woken up...get them naked and pat them down with a cold wet wash cloth. I'd sometimes need to repeat this throughout a nursing to get them to keep eating.  It's annoying, but it works.

2. Learn the difference between nursing for comfort and nursing for nutrition. All the information you read about breastfeeding before you actually do it tells you that pacifiers are the enemy. No they aren't. They save YOU from becoming a human pacifier. A few minutes of extra comfort nursing are usually appreciated, but there comes a point when you just don't want to be stuck under the baby when they aren't really eating any more. Extract you, insert pacifier in one swift swoop, and you can usually set baby down to sleep without them wising up to the switch.

3. In those first few weeks use lanolin ALWAYS even when your boobs feel fine after you nurse. It works much better to prevent painful cracks and sore spots than it does at treating them after they develop. And baby's latch is horrible for at least those first few weeks, so your nips take a lot of abuse.

4. Breast milk can aggravate reflux, especially when you have an oversupply of milk and/or baby gets too much foremilk. Learn how to spot it so you can salvage your breastfeeding relationship before it's too late. Remember this ordeal with Avery? If we'd known it was reflux earlier and treated it, we most likely wouldn't have needed formula at all.

5. Pumping may or may not be in the cards for you, and your output has no reflection on what baby actual consumes. You may also have different reactions to it with different children. With Avery, pumping drove me crazy and I couldn't handle it. With Jake, we spent about 3 months exclusively pumping with much more success. Also, the type of pump you choose can give you different outputs and you really have to experiment with them in order to get one that works for you. As an example, I have 3 in my current rotation.  I have an electric Medela, a manual Medela, and a manual Tommee Tippee. The electric works best for me and is what I use here at home.  The Tommee Tippee works well, and that's what I kept bedside. I purchased the manual Medela to keep in the car when I was exclusively pumping for Jake and while it's more comfortable than the TT there isn't enough suction for me so I barely get any milk out of it, and therefore don't ever use it. Really, it was a complete waste of money since it just sits there. So...different pumps, different reactions. Don't be surprised by it.

6. Your pediatrician, and possibly the lactation consultant everyone pushes at you might be the most full of crap when it comes to nursing advice. Do your own research. Kellymom.com is the best resource hands down, though their site can be a bit difficult to navigate if you aren't familiar with it. La Leche League is another good one, as is Dr. Jack Newman. Treat them a bit like using WebMD...you're going to get all sorts of scary information when you're looking into how to fix a nursing problem.  Sort through all the junk you know it's not and you can pinpoint what will work in your situation. (i.e. Just because you have a plugged duct, does not mean you have mastitis.)  Use the "symptoms" you have, even if that symptom is just baby crying at the breast. That link above...when I went to see that LC I basically got confirmation that Avery's latch was good, a smile and "you're doing great" but I received zero tips or tricks for getting her to keep nursing. No, "why don't you try this for a couple days and see if it helps" type stuff.  I was really struggling, which is why we so easily switched to formula and never looked back.

7. Your breastfeeding relationship with your baby is in a constant state of flux and your commitment to it will be tested regularly. With Jake, this has been especially true. We started out exclusively nursing, then morphed into exclusive pumping & bottle feeding, then a mix of the 2, back to exclusive nursing, and now we're adding in solid foods and a bit of formula on top of his nursing because the doctor would like him to have more calories. There were several times along that journey where I was willing to give up nursing all together, but Jake's discomfort with formula was more of a hassle to deal with than just sticking it out. Just remember to be flexible about the situation and that it's okay to change your mind on how to feed your baby.


Saturday, March 29, 2014

DIY Learning Tower WITH MATERIALS LIST!!

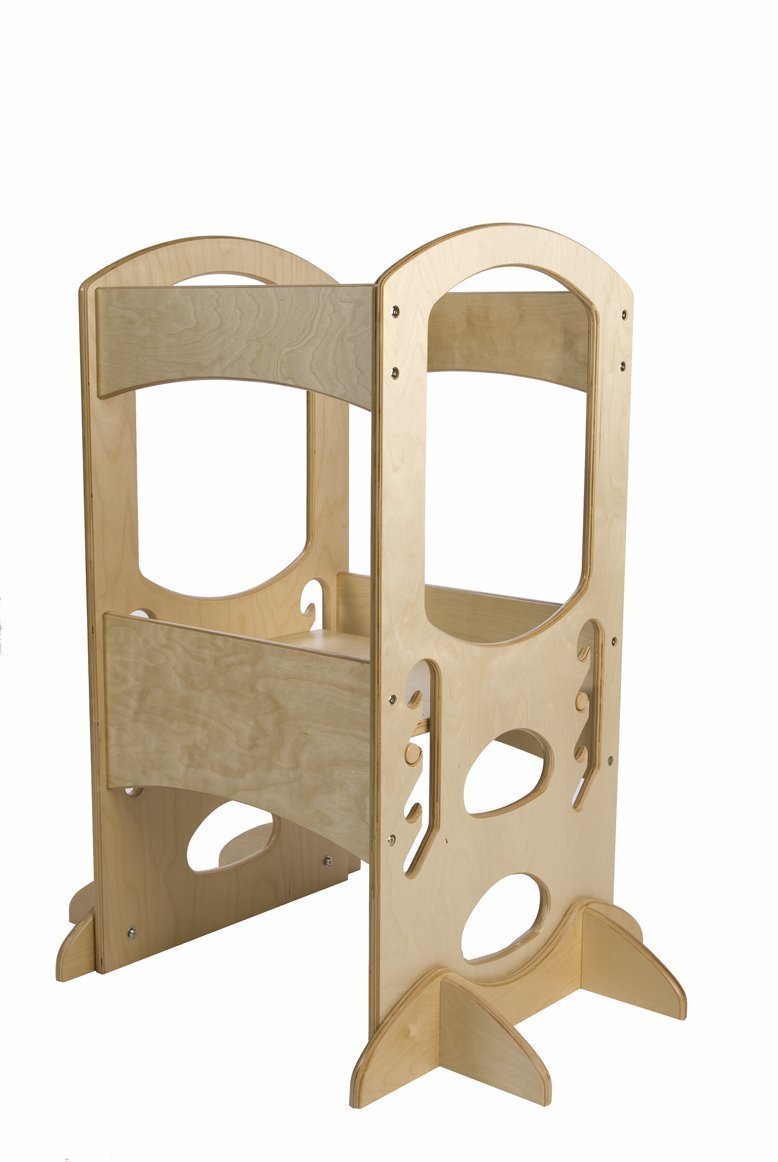
Ever seen one of these?

I did...At my favorite children's thrift store, Once Upon A Child.  It was $40 and since there was no adorable little toddler standing on it, I had no clue what the thing was for. Fast forward a few months and I find out it's called The Learning Tower and you can use it to boost your tot up to counter height so they can help with small tasks in the kitchen and explore the world of food. I also learned that it retails for $200. Ouch! Besides wanting to shoot myself for not nabbing it that day, I instantly knew I wanted a fake version. Today we finally got around to building it...


I found a couple tutorials online (here and here) but what frustrated me is that neither had a list of supplies. Nick and I have been in our house only a couple of years, and he's really not the handiest of fellows so we didn't just have scrap wood lying around waiting to build this thing. We also have limited tools.  So what I really needed was a list of all the stuff I'd have to buy in order to add up how much this project was really going to cost before I decided to tackle it. So here it is:

(1) Ikea Bekvam Step Stool ($14.99)
(1) 8 foot long 2x2 ($1.82)
(1) 8 foot long 1x4--you will have a LOT left over ($2.06)
(1) 5/8" Dowel Rod--($2.48) As we were putting this together the thought occurred to me that you could also just use another piece of 2x2 if you don't want to mess with this.  It'd be much easier to attach and you won't need the speedbor. (But you will need another piece of lumber since the leftover of the first 2x2 won't be long enough.) You'll use less than 2 feet of length but it will vary depending on how deep you drill the holes.
(1) Box of 1.5" Wood Screws ($5.58)--we used a #8 size for both types
(1) Box of 2.5" Wood Screws ($5.58)
Total materials cost: $32.51 plus tax & needed tools. I can live with that!

Now for the tools. I'll only include the price of the Speedbor because that's the only tool we purchased. Obviously, you'll have to figure out which tools you personally need to purchase and can figure out your own budget for each. 
  • Tape Measure & Pencil
  • Circular Saw
  • Power Drill
  • A drill bit appropriate for the diameter of your screws (for drilling pilot holes)
  • Wood boring spade drill bit, sometimes labeled as a speedbor--($3.78) This is what it looks like. It's also the one we purchased.You'll use it to make the notches for the dowel rod.
  • Something to set the wood on in order to cut it. We don't have saw horses, so we slid the pieces through the rungs of our ladder.
  • An assistant to cut/hold/screw wood and basically do the manual labor while you pass along the instructions. (For the True DIY'ers that are capable of using power tools unassisted-unlike me-you will still need some help holding boards in place.)
A couple of notes since I don't want to re-write the tutorials (just go check them out, it's easy to understand the instructions)...

Our countertops are 36" high. The vertical 2x2 posts above the stool were cut 16" in length. Measure your counter to determine if you'll need to cut them to a different length, and to see if you'll need additional lumber.

Cut the holes for the dowel using the speedbor before you screw the posts to the top of the stool.  Much easier and much safer. When you're ready to insert the dowel, screw in the first post, set the second post in place and sandwich the dowel in between (in the respective holes) while your lovely assistant screws in the second post.  No wrestling to get the dowel in that way. We did not cut our holes all the way through the 2x2. Instead we made a notch that went about half-way through the post.

We started by measuring and cutting our vertical posts and all other boards were measured and cut as we went along.  Just keep checking the photos and you'll easily see where everything should go. Just make sure that your side rails are the same length (even if when you measure they're not) because it will square up the top once you have everything screwed in place.

Drill the pilot holes.  You can get the screws to go through the wood without them, but hubby did crack it in a couple spots on the 1x4's. Just suck it up and do it...

You'll notice in our photos that we used a piece of 2x2 for the lower rail on the center front. DO NOT DO THIS! As soon as we put Avery in the tower we realized that you need the 1x4 for both front rails so the kid can stand on the tower and not get hit in the knees. This will be remedied on our tower during the next nap-time.

And there you have it!!


Monday, March 10, 2014

DIY Bath Crayons Review


Avery is an active little toddler now so I'm always looking for new ways to entertain her.  She also REALLY enjoys bath time. As in, she starts running to the bathroom the second she hears the water running and tries to climb in while her clothes are still on.  So the other night we tried our hand at some homemade bath crayons. There are tons of "recipes" on the web.  (I found this one and several more through Pinterest.) They all are essentially the same thing...soap mixed with some sort of coloring. Some recipes will tell you to grate a bar of soap, melt the shreds, then mix in your colors and form the crayons freehand.  Not only does that take FOR-EV-ER it's a complete mess and you end up with ugly looking lumps for crayons. I went with the much easier option of using melt-and-pour soap base. I had a few chunks leftover from other projects so I used those. I didn't measure, but it was probably half to one ounce per crayon, but this will also vary depending on which molds you use and how deep you fill them. Almost all the blocks of soap base come with a pre-scored grid on top for easy cutting, just use one of those cubes once they're cut apart on the scoring line. Each one is roughly an ounce.

So I had my base picked out, but the coloring was where things could potentially be tricky.  Some sites suggested soap colorants, others suggested the liquid food coloring straight out of your pantry (the same stuff you use for frosting or dying easter eggs). Others still swore by the gel type of food coloring.  For each of these methods somebody had made a comment along the lines of "Don't use that!  It stained my kid/tub and I still can't get it off!" as well as the opposing "This didn't work at all! The colors never showed up on the wall. Don't waste your time!" posts. So, I'm going to share what I did and the results...

I chose to use liquid soap coloring. Just the basic stuff you can find at craft stores right next to the hunks of soap base. Mostly, because I had it already and I knew I was out of red food coloring. There wouldn't be much point in mixing materials, especially since I didn't even know if this would work, so that's what I went with. I also wanted to load up my soap with the color to make sure it showed up on the tub wall. For each crayon I mixed about one ounce of melted soap base (I used white since I thought the color would show better) with 20 to 30 drops of the liquid soap color. I started with 20 drops, mixed, and if I wanted something brighter or a slightly different shade I added the extra 10 drops. I made red (which was more of a raspberry pink because of the white base), blue, green, yellow, and orange. I used a mold similar to this one so they would be more crayon shaped.


Here's what I found when we used them:

  • The crayons worked better on a dry tub wall, especially when the crayons and the hands holding them were still dry too. They worked when wet, but instead of bright, bold colors, you got pastels.
  • Yellow is completely useless as a tub crayon color.  Wet or dry you can't see it and the crayon itself was so neon yellow it was disturbing, so I know there was enough coloring in the soap.
  • The more obnoxiously bright the crayon is, the better the color on the wall. Don't be shy in adding the soap color for fear of staining. (See below.) Our red crayon which had the most color (I was initially fighting against the pink shade we ended up with) showed up the best. Blue was next since it is a darker color, and then green which I also added extra color to.
  • Those suckers are slippery once you get them wet.  I had a hard time hanging onto them myself and it was significantly more difficult for Avery. She still had fun chasing them around the tub though, so this isn't necessarily a bad thing.
  • They stain...sort of. It will color the water and you'll see the dye wherever your kid directly touches themselves with the crayon (Avery had an awesome set of blue highlights in her hair for a bit) but a quick rinse with water and it comes right off. I will say, we washed our wall before getting out of the tub so I have no idea how this would compare if we'd let it dry completely and tried to wash up later. It is also my belief that it is actually the soap that is dyed and not the object it's applied to, so I'd imagine if you still see color on the wall it's because there's still soap there.  Anything that removes soap scum should also clean up the color. I will also note that we have a traditional fiberglass tub surround and not tile/grout so I have no idea how those would be affected. As a comment stated in one of the various blogs I read before making these crayons, this might be a project that is fun to play with and then you take your bath. Cleanup is easy, but there will be color everywhere. That being said, I don't believe cutting back when coloring the soap will fix the issue. Instead you'll have bath crayons which won't show up on the wall, and that defeats the whole purpose.
  • I suspect this batch of crayons won't last long based on the soap base I used.  It was actually a cheap base leftover from a pre-made kit that I got for free, and not the soap base you'd purchase in a 1 or 5 pound block on it's own.  It was significantly softer than other bases I've used in the past.  Half the crayon had melted into the bath water and the outside of the crayon had a squishy texture by the time we were done. If you want them to last, use a better quality base. I also suspect the mold size/shape helped contribute to our texture issues.  When I make them again I'll use a different mold so they're fun chunky shapes.  Hopefully they'll last longer and will be easier for little hands to hold on to.
  • They are super fun!  Eventually it was time to get out of the tub and go to bed. Avery cried when I took her crayons away because she was having a blast. She has never done this with any other tub toy to date.  We definitely look forward to playing with them again.


Wednesday, November 20, 2013

Hospital Packing Part 4-The Stuff You Shouldn't Bother With

In posts 1 through 3 I shared the items that I packed for Mom, Baby, and my own Comfort.  This list is the stuff you shouldn't even bother with putting in your suitcase. They're items I frequently see on suggestion lists and I completely disagree about packing them. Here's why...

  • Stuff for Dad. Mostly because, he doesn't really need much. Also, he's got the ability to leave the hospital for an hour or 2 and go home to take care of anything he might need. (Remember that down-time? When you are going to be sleeping.)  At most, I'd have him bring a change of clothes, a toothbrush, and some deodorant.  And he can leave them in the car until he needs them the next morning. On the off-chance the hospital allows him to use a shower (most don't because Dad's aren't patients) he can use the toiletries you've already brought for yourself. An exception to all this would be if you're at a hospital with a birthing tub or shower in your delivery room. In that case, throw a swimsuit for him in your suitcase if there's any chance he'll be joining you as part of your labor support.

  • Postpartum Menstrual Pads. I know. It's not pleasant to think about, but there's going to be some serious bleeding going on.  You'll be soaking through them so fast that if you bring your own you'll go broke from their purchase before the end of your first day. Use the ones the hospital provides.  They work better, plus you're already paying for them. Save the ones you like for when you get home.  You'll have the opportunity to use them for at least 4 to 6 weeks. Another reason not to bring them is for their size.  You're going to want the huge ones and a box will easily take up a quarter of the space in your suitcase.

  • Another waste of suitcase real estate is a box of disposable Breast Pads.* Your real milk doesn't come in for 2-3 days.  For most women that means it's happening after you get home, so you won't be leaking enough breast milk to warrant dragging them around. The box is going to sit untouched in your suitcase until then.  I have a zipper pocket on my travel boppy pillow that allows me to stash some nursing items. I placed 3 pair in this pocket for "just in case" rather than bringing a whole box like I did last time. If you do happen to need breast pads before you leave, the hospital will be able to provide some or you can stash the box in the car and have somebody run out to grab it.
*It's uncommon, but some women start leaking breast milk before they deliver.  If this is you, obviously this item gets moved to the Mom's Essentials list and you'll definitely want to pack a box if you have a preferred brand.

That's all of it! The stuff you need and the stuff you don't! Bring as little as possible with you to the hospital and you can't go wrong.  Things don't get lost or forgotten and someone you love doesn't have to keep dragging it around whenever you switch rooms.  May your labor and delivery run as smoothly as your packing!

Hospital Packing Part 3-Creature Comforts

If you haven't yet, please check out my packing list for Mom's Essentials and Baby Supplies.

So this is my list of not-so-essential supplies that are being packed this time around.  It's also the section of items that will likely be a lot more personalized when you pack your own bag.  But, I promised you an explanation of everything that went in my bag, so on we go...

  • Cell Phone & Charging Cable. Not only will I be able to contact family and friends after delivery, but my smartphone is what I used to take the majority of the newborn photos of Avery when I was still in the hospital. It's a lot smaller than my camera, so it's easier to have next to me in the bed and it doesn't take up a bunch of room on the bedside table. (Which is where everything seemed to naturally accumulate during my last postpartum stay for fear of it being lost.)  The smartphone also allows me the ability to stay connected to the internet if I have some down-time where I don't want to sleep (more on this in a bit). Having the internet connection also allows me to instantly upload all those adorable photos to excited family members so I don't have them popping by to see me before I'm ready. (But I'm sort of weird and don't want visitors when I'm in the hospital.  Remember this post from the last visit?) One thing to remember though, MAKE SURE YOU TAKE YOUR CHARGING CABLE BACK HOME WITH YOU.  It seems common sense enough, but my nurse told me it's the number one thing parents forget in the room when it's time to go.  They unplug the phone but leave the charger in the wall.  And sure enough, my husband was one of those people. (I happened to catch it before we left though.)

  • Digital Camera with extra batteries. Yeah, I can use my cell phone for a lot of photos, but sometimes it's nice to have something with a little better picture quality or functionality (think low-light photos during that 3 a.m. feeding). And, you only get one opportunity to take those first precious shots of your little one. It's best to make them count by using the best equipment you have available to you.
I'm going to stop here and note that these are the most valuable items price-wise that will ever make it into my hospital room. Even then, if they are not directly next to me or my husband they are placed out of sight. (Yes, EVERY time you need to get up to pee! And don't forget that wallet you brought while you're stashing stuff.) While I'm trusting of the staff in my hospital, the maternity ward is constantly full of visitors...even if they're not my own. Bringing pricey items with you just invites trouble. It's like leaving valuables visible inside your car and parking it at an amusement park.  You have a higher probability of a broken window when you return than for your stuff to be sitting in the front seat where you left it. Besides it being in the way, I just don't want to babysit it.  Would my laptop be easier to use than my phone for browsing the web when I'm bored? You bet! I'd much prefer it!  But I'm more comfortable replacing a $200 cell phone than a $1200 laptop.  Same thing goes for jewelry.  Not that my wedding ring has fit for more than a couple weeks of this pregnancy, but any jewelry items have to be removed in the event you go for a C-section.  I do not want a small (a.k.a. easily lost), valuable, and sentimental item like that to go missing because I have to remove it. Best not to risk it and leave it at home.
  • Next item...SNACKS! A lot of hospitals have weird times for their cafeteria to be up and running.  Some close down entirely after a certain time, others offer a limited selection.  My hospital offers only deli sandwiches after 6:00 pm...the ones that were made around noon and have been sitting in a fridge all day getting soggy.  When you're not allowed to eat during labor (and you spend an extra 12-24 hours in the hospital before that for an induction...where you're also not allowed to eat) and you deliver your baby at 6:38 pm not having food is a MAJOR problem. Did I eat the nasty sandwich from the cafeteria? No.  Because I came prepared with food I actually like.  This time around I packed a couple of those tuna and cracker "meals" where you can mix it up how you like it, some trail mix and a few cheez-its in snack-size Ziploc bags, and 1 little Debbie snack brownie for good measure. Fruit is always a good choice too, but I packed early and wanted things that wouldn't spoil in my bag over the remainder of my pregnancy. 

  • ONE (small) form of entertainment. This time I chose to bring a deck of playing cards. Last time I brought along the cards, a knitting project, and a book. I took them because a lot of moms said there was a lot of down-time during the day where baby is having tests done, or getting a circumcision, or some other procedure.  That's true, but I spent the majority of that down-time SLEEPING.  Your body just underwent some MAJOR trauma.  You're going to be exhausted and not feel up to doing anything besides laying in a lump on your bed. Of the things I brought last time the only one I touched (except to curse its existence when trying to fit everything back in the suitcase when we were leaving) was the cards.  Hubby and I played a couple of games while I was in early labor to help distract me from my contractions. I'm bringing them again for the reason that it entertains both of us, they're small, and light-weight...making them perfect to shove anywhere in the suitcase. The book and the knitting project took up too much valuable space and I didn't want them anyway.  If I really want to read I'll just download an e-version on my phone.

  • My own pillow. The hospital ones are like sleeping on cardboard.  You need to wrangle 8 just to get a decent sleeping height and then they crunch under your head every time you move.  Don't forget to put a bright colored pillow case on it so it doesn't get mixed up with the crummy ones. Depending on how long you'll be staying, this can be left in the car until you're ready for it.  When I had Avery I stayed at the hospital the night before my induction.  Since I was sleeping there, I took it in with me right away.  Had I just spontaneously showed up when it was "time"  to have the baby I'd have left it in the car until I was moved into my postpartum recovery room.

  • My Boppy Nursing Pillow. This one will stay in the car until I'm ready for it in the recovery room. I didn't bring it with me when I had Avery.  Along with the normal struggles of learning to breastfeed, I could never get her propped to the right height for me to be comfortable sitting in the chair. (And nursing on the bed was even more of a joke when it came to comfort.) I used it the very first nursing session after coming home and told my husband, "Dude!  Why didn't we bring this with us?!  It's so much better!" It didn't seem to crush down under the weight of the baby like a stack of regular pillows did for me.  Since I have several of these pillows now (including a travel one that will be used for this visit) I won't be making the same mistake again.
In the next post, all the things I didn't mention!

Hospital Packing Part 2- Baby supplies

If you haven't read part one, check it out HERE.  It includes the essentials for mom.

This post will go over items you need to bring for baby.

  • 2 Outfits for baby to wear home. No more. No less. Why 2?  First off, it's not a fashion show.  There's plenty of time to dress up baby in cute outfits and take a million pictures, and those will turn out better with the lighting you have at home anyway. You don't need to take the lot with you. Secondly, as soon as you start sorting through your baby clothing and get everything washed pre-arrival you will notice that there is a great variance in the SIZE of baby clothing, even when it is labeled to be exactly the same. Since there's no way to tell exactly what will fit your newborn, take one newborn size outfit that looks like it will never fit the tiniest of dolls, and a second newborn size outfit that looks larger in comparison. And yes, I do mean newborn size and not 0-3 months.  Your kid will be swimming in a 0-3 months size. If they have matching hats, that's even better.

When choosing your outfits here are a couple things to think about.  First, the weather. Generally you want baby to be wearing one more layer than you are comfortable in. If it's 80 degrees outside you probably don't need a wool sweater for baby. Wearing a t-shirt yourself?  A newborn is usually good in a long sleeve t-shirt. You can always wrap baby up in a blanket if you feel they need more.

Next, try to find an outfit that is NOT a onesie, and opt for a t-shirt style top instead.  These can be difficult to find, but it's worth it.  The reason being is that baby will still have the stump of their umbilical cord. Onsies will press up against that wound and irritate it (and by extension, the baby and then you.) The cord stump also tends to ooze for a bit while it's drying and that goo gets all over the onsie and is a pain to wash out. The t-shirt style tops provide some relief from the rubbing and helps the cord breathe better, which promotes faster healing.

Finally, if you can find an outfit that has fold over cuffs for the top and attached feet on the bottom you've hit the baby outfit jackpot.  Baby's nails are REALLY sharp when they're born so you'll want to cover their hands.  The little scratch mitts that you can purchase separately don't stay on for beans, plus you can never find them in the suitcase because they're so tiny.  The fold-over cuffs give you the same protection without needing to track anything down. Baby Socks are problematic for the same reason, which is why the footed bottoms are perfect.
  • A blanket to place over the car seat. In my case an extra heavy one since it will be the middle of winter.  If you're having a summer baby, just a light receiving blanket is fine.  Something to block the sun and wind on your way to the car or to keep them warm if the snow is flying. (Remember, bulky coats and snowsuits are a no-no since they interfere with safety buckles in car seats. When in doubt, keep an extra blanket in the car for cold weather.)
    •  If you have pets: Pack an extra receiving blanket or a small scrap of fabric. Snuggle baby in this blanket as often as possible during your hospital stay. When it's time to come home have someone go ahead of you and let your pets sniff around this blanket for a while. Since it smells like the baby, it's a great way to help introduce him or her to your furry friends.
That's the list for baby.  Really.  I'm serious. That's it. Everything else you will need, diapers*, wipes, pacifiers, bottles, a small hair comb, circumcision care supplies, etc. the hospital will provide. Use their stuff since it's already part of your bill anyway. When you leave, take any extra baby supplies with you.  Just clean out the drawer of that bassinette and shove it all in your suit case. Again, you have already been charged for these supplies so don't feel bad about swiping them.  If you don't end up using them at home you can always donate them to someone in need.

In the next series of posts, extra comfort/convenience items and the things I left out of my bag on purpose.

*I have heard a few stories from moms where their hospitals did not provide newborn diapers and they were required to bring a pack of their own.  This is really rare, but if you're worried about this or any other baby supply you might need, just give the hospital a call to double check on what specifically is provided.

Tuesday, November 19, 2013

Hospital Packing List-Mom's Essentials

I just finished packing my hospital bag for baby #2. Even though I've had a postpartum visit once before, I still scour the internet to find out what other mom's pack to take with them.  I find the majority of lists to be very helpful and they help me to narrow down my own. Others leave me saying, "I feel sorry for that poor lady's husband." Mostly because MY husband was that guy the first time around...the poor schmuck dragging all that stuff that I just HAD to bring along with us. (And I'm sure cursing under his breath the whole time.) I thought I packed "light". I didn't pack even half of what these women tell people are essential. Still...the lists are fascinating to me so I thought I'd share what I put in my bag this time around and why. Some of these really are must-haves, others are my personal preference when being away from home. It's long, but hopefully a helpful read.

  • The very most important item. DO NOT LEAVE HOME WITHOUT THIS. In fact, it's best to install it several weeks before you go to the hospital just in case baby comes early. (Bonus, you can get the installation checked, usually for free, by a member of your local police or fire department.) The Car Seat. You can not leave the hospital without putting baby in it.  That being said, don't bring this inside the hospital when you come in to deliver.  Leave it in the car until it's time to go home. No lugging it around when/if you have to change rooms and it won't take up valuable space in your recovery room. You will also want to be very familiar with adjusting the car seat for the proper fit.  Learn how the straps move into the different height slots, learn how to tighten them against your child, learn the proper way to insert or remove any accessories (such as head inserts) IF they are safely allowed at all. In most cases, if it didn't come in the box with the car seat, it won't be safe to use with it. Holding a wiggly newborn who is screaming because they don't like the car seat is not the time you want to be figuring these things out.
  • Your purse or wallet containing your I.D. and insurance cards. Even if you're pre-registered at the hospital you'll be required to show them to a staff member at least once.
  • A Folder. This is something that is optional, but I highly recommend it after wanting one during my last stay.  You get 8 billion pages of paperwork when you have a kid. Everything from useless pamphlets, to discharge instructions for both you and the baby, to those all-important keepsakes like hospital bracelets and baby footprints, and then some. Especially for those keepsake items, it's nice to have a place to store things where they can lay flat and not get mangled amongst all the other stuff you've shoved into your suitcase.
Okay, let's move on to things specifically for mom...
  • Flip Flops. Cuz eww...hospital floors.  Slippers would work too.

  • Pajama Set, with a robe, that is easy to nurse in. Last time I stayed in my hospital gown until I was able to take a shower.  It was nice to change into something clean and comfortable that actually fit me instead of drowning me in ample amounts of itchy fabric. Plus, it doesn't have that god-awful gap in the back that flashes your naked behind to the entire world!  You show off enough of your body during delivery. A bit of coverage feels really nice.  Makes you feel like you still have some dignity. Plus, if you want to walk the halls or take baby back and forth from the nursery it's nice to be covered. (TMI alert!) Also, as a girl who despises wearing pads (which you WILL be doing after giving birth, like it or not) I feel like I have a little more support when I'm wearing pants, even if they are loose comfy ones.  They help keep things snug against my body and I don't get paranoid about leaks as much. On this same note, these pajamas are also a set that I won't be devastated if they end up getting ruined from leaking through a pad. Yet another reason I'm bringing my pajama set...it's my "in case I end up with a C-Section" going home outfit. It's loose and adjustable enough (thanks to a draw string) that it hopefully won't irritate an incision.

  • One pair of jersey knit shorts. These are thrown in as an emergency case of temperature control for myself and not necessarily something I'd suggest as essential.  After delivering Avery I was incredibly hot and uncomfortable and I could not stop sweating (and this was in an air conditioned room).  I was stuck with the temperature that the hospital set for the entire floor. These will allow me to be a bit cooler should the same experience happen again.

  • An Outfit for me to wear home, with a nursing tank as an under-layer. For me this means a pair of maternity pants, a maternity t-shirt, the previously mentioned nursing tank and a pair of socks. This "item" was actually one I went back and forth on since it takes up a good chunk of suitcase. I'm not opposed to wearing home the same thing I came to the hospital in, but there are 2 reasons I ultimately chose to pack it.  1. I wanted the nursing tank anyway just to have an extra (the top to my pajamas is actually a nursing tank) in case the other got wet from nursing or covered in some form of baby liquid. 2. I'd at least want to bring along a pair of pants on the off chance that my water broke on the way to the hospital. No thanks to putting on something soaked in body fluids. While I'd wear my pj pants in a bind, I am expected to give birth in January in Michigan. Something a little warmer is appreciated. Since 1 and 2 made up 1/2 the outfit, I just tossed in the rest.

  • A bag of Toiletries. Soap, Shampoo, Conditioner, Hair Ties, A headband to use during delivery, Hair Brush, Comb, Toothbrush, Toothpaste, deodorant, chapstick, breastfeeding lanolin, and makeup. Nothing ridiculous like a curling iron or hair dryer that eats up valuable space.  I want to take a shower and look like a human being in at least a few of my newborn's photographs.  The hospital will likely have supplies if you forget to pack things (or don't want to), but they're going to be the generic, multi-purpose toiletries that aren't very nice to use. Especially when it comes to things like soap & shampoo. (Which are 1 combined product at my hospital.) I could probably do without the makeup, but just putting it on helped me feel more "together" after having Avery so I tossed it in again.  This also might be important to you if you're having a lot of visitors. If you wear glasses or contacts bring supplies for both.  I'm lucky I don't need these but a lot of other moms have told me they were irritated by one or the other during their delivery, so it was nice to have the 2nd option.
I'd say that's a long enough post for now, plus I think it covers mom's "essentials" pretty well.  In future entries I'll share the other items I'm bringing for me, along with the supplies for baby.

Click HERE for the Baby Supplies post.
Or HERE for the comfort items I recommend.
Or HERE if you want to see the items I left out on purpose.

Tuesday, November 5, 2013

Xbox 360 Toddler-proofing

The main form of entertainment in our household is an Xbox 360. We use it for movies and Netflix, my husband plays games on it with his buddies, and we've recently started to use it for a connection to Pandora music in our main living space. If we're home, it's probably on in our living room. Or...it used to be.


Because it is used so much we don't dare put it inside our entertainment center behind closed doors.  To do so would risk extreme overheating and ruin the system. And that is just not an option! So, it sits up on top of the entertainment center...eye-level to a toddler.

Now I want you to take a look at the above photo.  See that green lighted ring around the power button. It's the equivalent of a bug zapper.  My girly sees the light and is drawn straight in. It's compulsive...she just HAS to push that button.  And once she does, she's rewarded with a pleasant little chirp to tell you the system has just shut off, or on, or off, or on, or off, or on... as she KEEPS pushing it in rapid succession. Yeah. Not cool. For us or for the electronic components.

I started browsing the web to see if I could find some type of guard to go over the front.  I did find a few (not specific to the Xbox but general ones for dvd players and such that would have worked fine), but they were at least $10 before shipping and all were just a cheap piece of plastic. Of course they aren't sold in stores, so I also couldn't just go out and get one.  So I started thinking...

Meet the bent acrylic picture frame!


A plain 8x10 frame, in landscape orientation. Normally $5 in JoAnn's framing department, on sale for half off. I flipped it around so it now sits like this on my entertainment center.


Avery can't push the button, it's clear enough that the remote and controllers can still be picked up by the sensor on the front of the Xbox, no airflow vents are blocked, and it's quick and easy to remove when we need to throw a disc in.  And again...$2.50.  You're welcome. Have fun toddler-proofing your own.